How to add new products
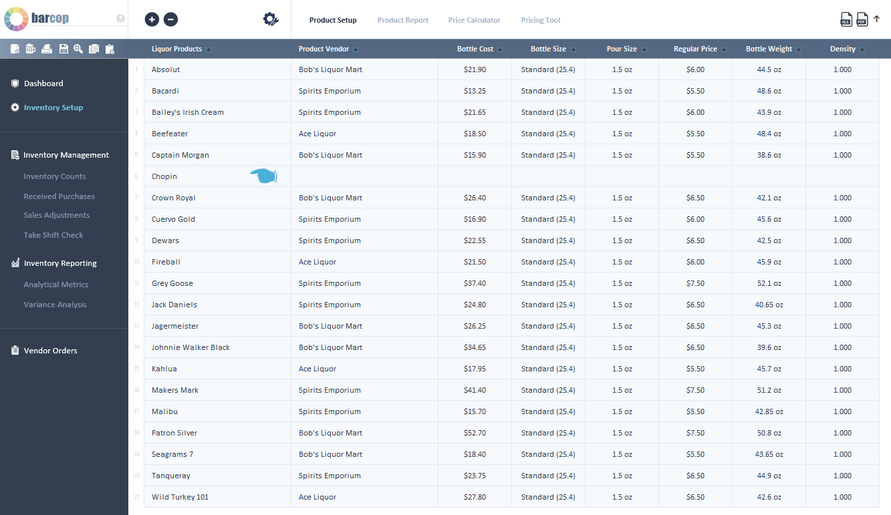
At times, you may need to add new products or remove old products from your inventory. Products are always added and deleted from product setup (see setting up inventory products).
Important: Add new products and delete products at the start of a new inventory period, right after you have created a new inventory file (see creating a new inventory file).
Adding a new product to your inventory...
So you received a new product and you need to add it to product setup. Add the new product when current inventory period is over and you have created a new inventory period file. After you create the new inventory period file, add a new product row in set up where you want the new product to go (see adding and deleting rows) and proceed with the normal steps for adding the new product's basic setup information (see setting up inventory products).

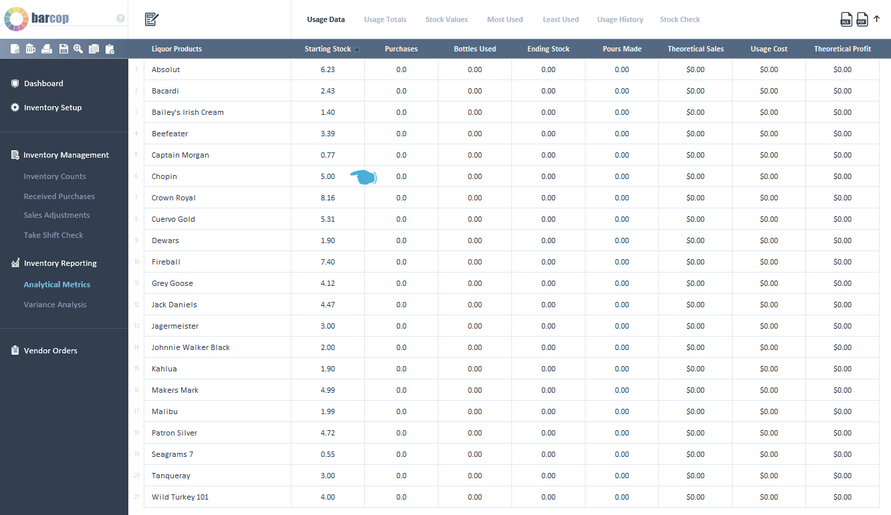
After you have your new product's data entered in product setup, go to "Analytical Metrics" and search for the newly added product in the "Usage Data" report. Because you are adding the new product after creating a new inventory period file, all of the product data should be zeros except for the "Starting Inventory" column. You will see the new product added and it will look like this with the "Starting Inventory" column empty.

Click on the notepad icon, select the product name from the drop-down list, enter the starting number of bottles, click add.

The "Starting Inventory" column should now be populated with the starting inventory number.

Important: When adding a new product at the beginning of an inventory period, you only add the starting product number to the starting stock column as shown. You DO NOT add the starting product number in received purchases also. Received purchases will be used for all future additions of the new product (see entering received purchases).
Final Step: You need to go to each inventory location where the new product will be shelved, add a new row in the correct order, and select the product name from the drop-down list (see setting up inventory locations). That product is now added.

Deleting a product from your inventory...
When you stop carrying a product and finally run out of stock, you need to delete that product from your inventory at the beginning of the next inventory period (after you create a new inventory file). To delete a product, go to "Product Setup" and click on the product name that you want to delete and delete that product row (see adding and deleting rows). The product row will be deleted throughout the program, except for your inventory locations. Go to each inventory location the product is listed in and repeat the same process to delete the product row.
Things to know:
1) You only need to go to "Analytical Metrics" and add a product's starting inventory when you are adding a new product at the start of a new inventory period. *This step is not done when adding products during the initial product setup.
2) If you are adding a new wine product you also enter the number of bottles in starting inventory. Bottle beer enter the number of cases, draft beer enter the number of kegs, food and miscellaneous enter the number of units.
